

Launch Planning
March 2, 2016: After our initial discussions with the crew from the Late Show with Stephen Colbert, we finally received the go-ahead to start planning to launch the "secret" payload to near-space. The payload would be a Stephen Colbert 3D printed head in an Astronaut suit, with Astronaut Ice Cream.
The mission was to re-create this footage from MakerBot back in 2011, with the addition of the Astro ice cream in the picture frame, along with Colbert's beaming bust. Did we mention that they were hoping to do the launch within the next 1.5-2 weeks? We didn't have a lot of time...
Unfortunately, the crew at MakerBot that had the High Altitude Balloon (HAB) experience were no longer around to help with this feat. So, the plan is that we (with the HAB experience) would partner with MakerBot (with the 3D scan of Colbert's head and 3D printing capability) to pull off the launch necessary for the skit.
March 10, 2016: In a little over a week, we were already in discussions with the folks at MakerBot and making fast progress. The plan was to print the head in a PLA thermoplastic material (Polylactic Acid), which would have the heads coming in at a feather-weight range of roughly 90 grams (just under 0.2 lbs for you non-metric folk). Check out that design!

The good news was also that the launch date could now slip a few weeks, so we were likely looking at an early April launch. The even better news was that Buzz Aldrin(!) was going to be in town for a skit, and may actually participate in our launch! This was turning into something truly incredible.
Construction of the Flight Test Craft

The Colbert Astro-army, ready to embark on their near-space adventure.
Finally, it was game time. Material was ordered and received. Copious amounts of Astronaut ice cream and 3D printed Colbert heads were on hand. We were ready to build the flight-test craft for our flight test at the end of March. Flight test date was set for April 9, 2016.
Requirements Definition
To start things out for a launch with Colbert, we had to identify our requirements for the launch. To summarize, the mission of the launch was rather simple:
Obtain video of a 3D printed Colbert Head (in an astronaut suit) and of Astronaut Ice Cream from near-space, with footage showing the blackness of space and curvature of Earth in the background.
That was it. Due to the fact that both the 3D printed head and the Astronaut Ice Cream were very light, we could actually carry this launch out using our baseline configuration as presented in our user guide here.
Launch Materials
With five launches under our belt at this time back in March 2016, we had the list of materials pretty much nailed down (list of materials with links available here):
- Styrofoam cooler for insulation
- Backup battery
- Spot GPS Tracker
- Cell Phone Tracker
- 30” Parachute
- 1200g Kaymont Balloon (100kft+ altitude)
- GoPro Hero4 Session (first time flying a real GoPro)
- Cut-down mechanism (new component, to help with recovery in the case of a tree landing)
- Space PAL (Payload Attachment Line) – quick disconnect system (detailed blog post about this coming soon)
- Payload: 3D printed Colbert Head and Astronaut Ice Cream (1 Ice Cream package outside, 3 more affixed on the outside)
To ensure that all flight video settings using the new GoPro, the cut-down mechanism, and everything else would be optimized for the actual launch with Colbert, we scheduled a flight test, deemed Colbert Flight Test 1 (CFT-1). The story of the actual launch day will be the focus of next week's post. Luckily, due to the utility of our flight prediction and tracking tools there was no need for a CFT-2.
Construction of the Test Craft

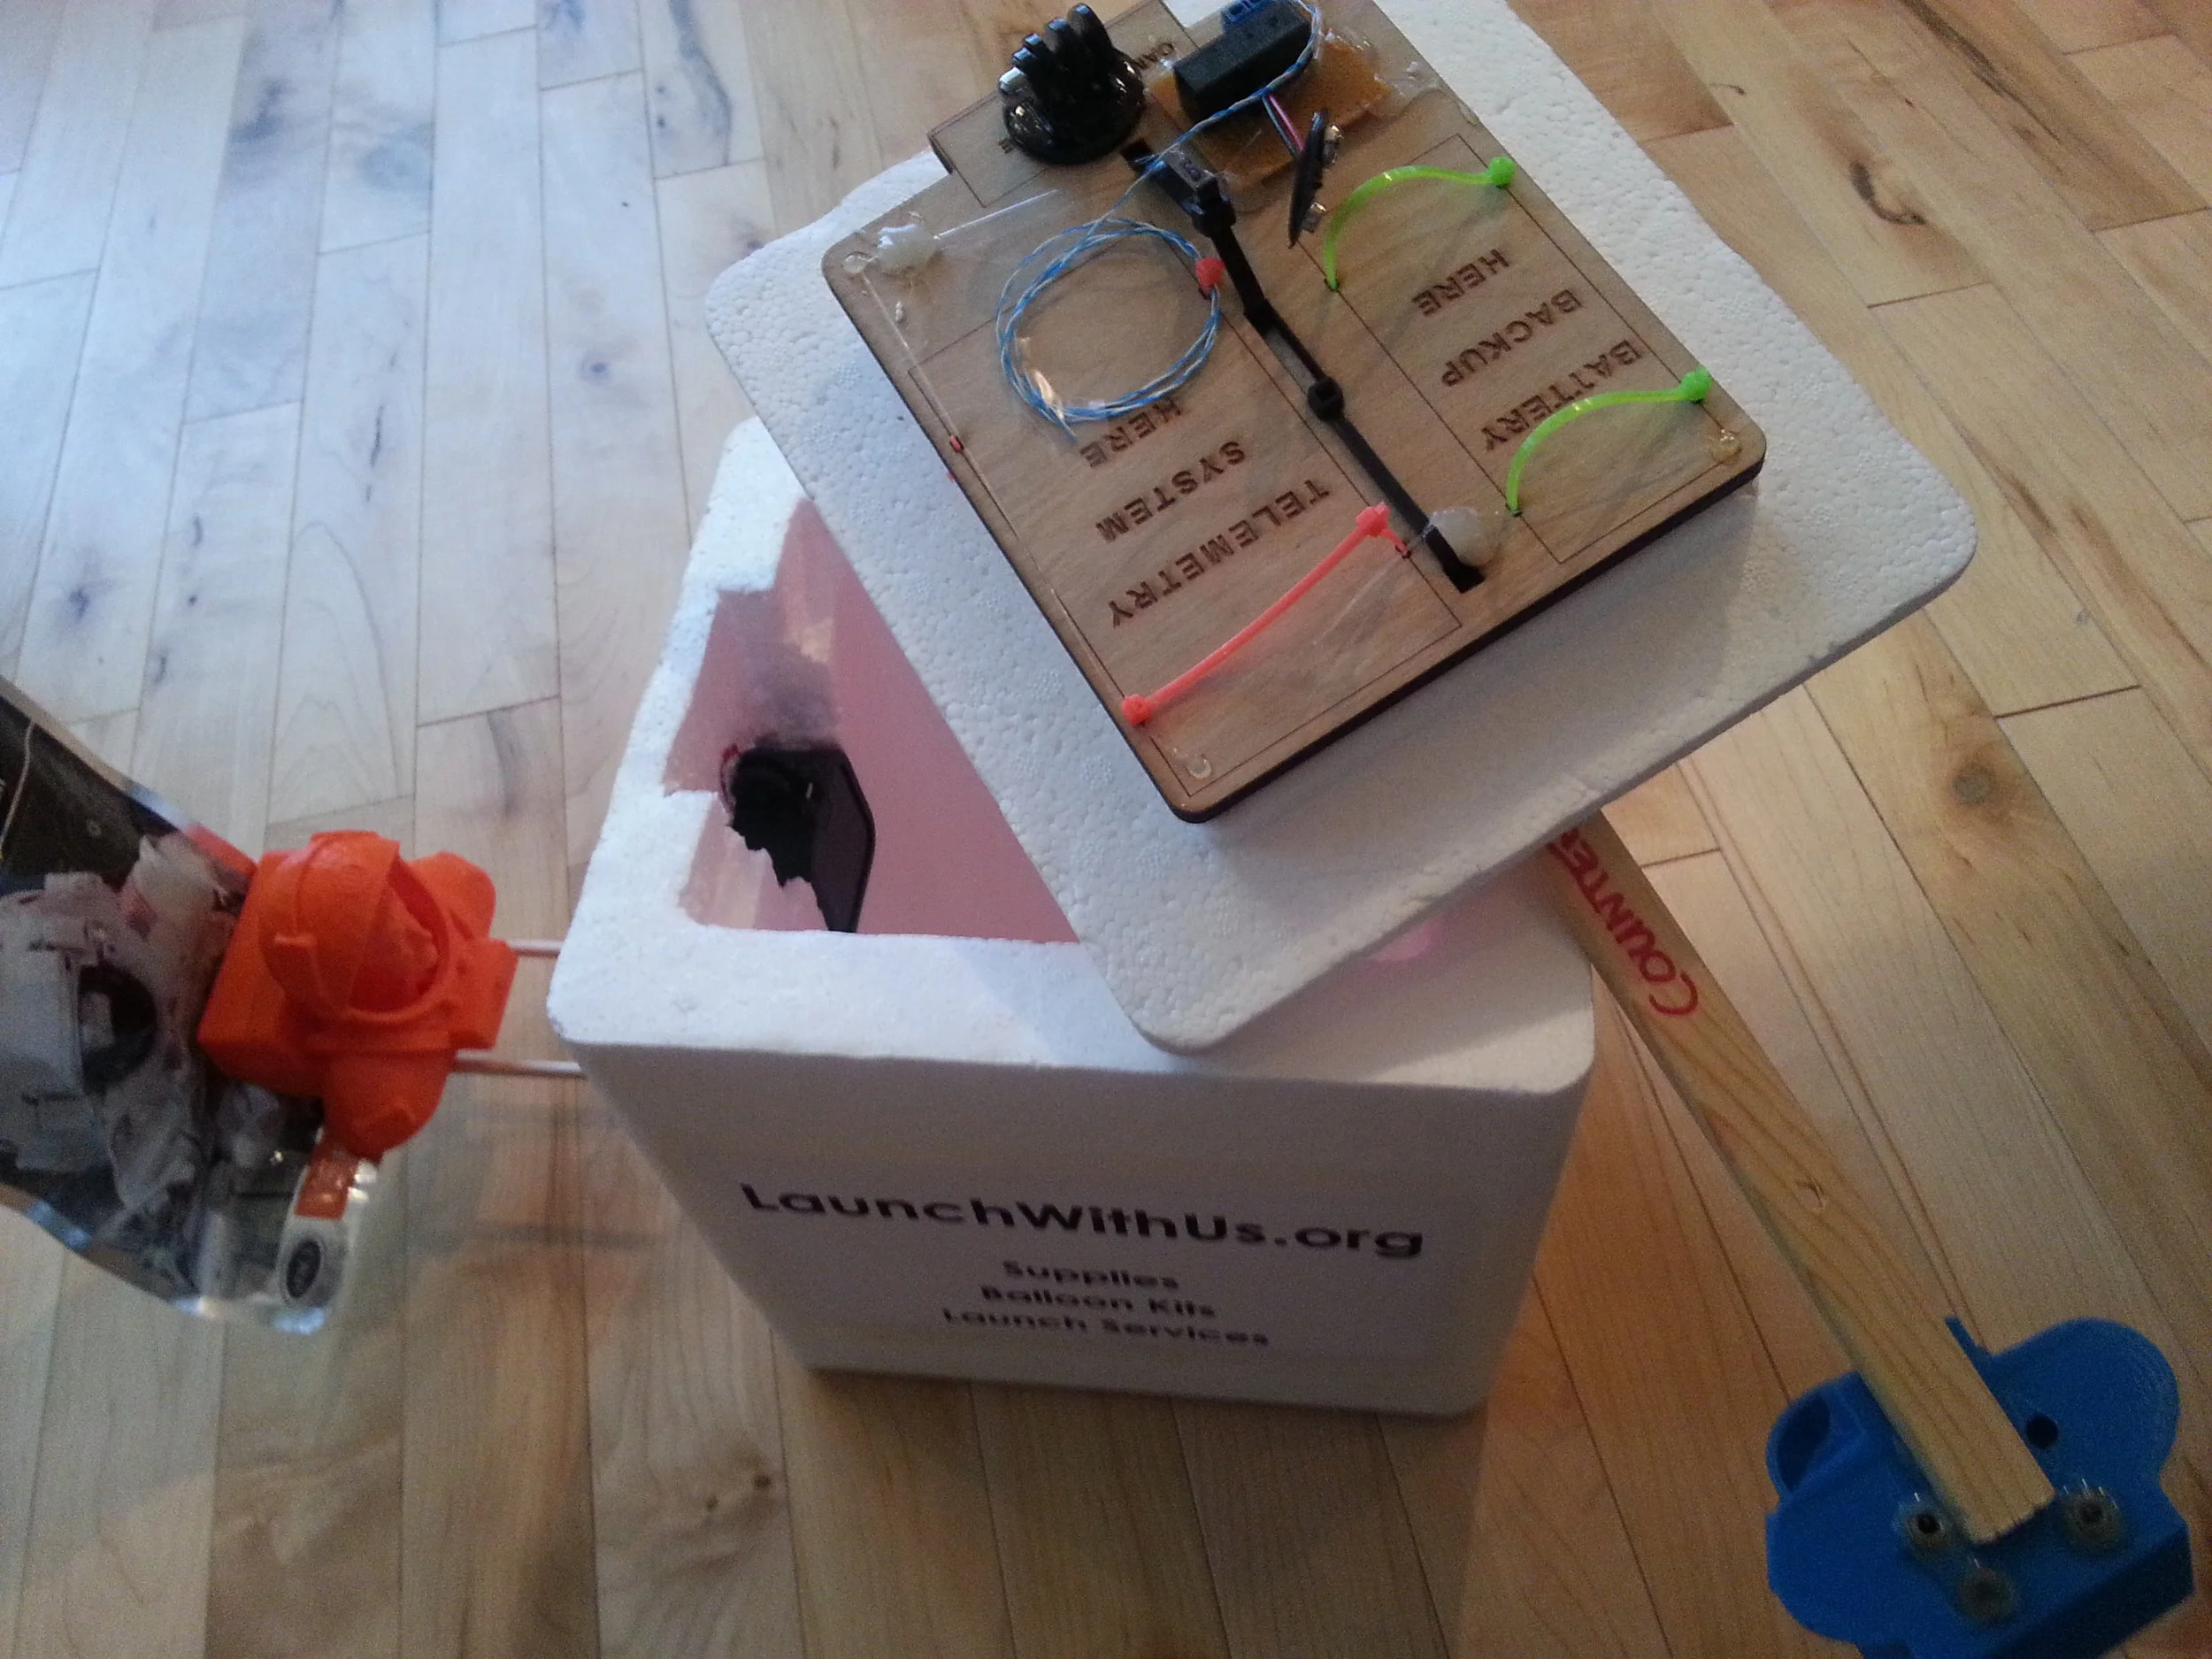
The top assembly of our Styrofoam payload, with tracking cell phone, backup battery, cut-down mechanism (aka wire burner), and GoPro
Most of the flight vehicle construction was well known at this point. We had our laser-printed payload system, which provided quick and easy attachment of the tracking phone, GPS, and camera to a single backbone in the payload, which also provided the line attachment and sever mechanism.
Modifying the Styrofoam cooler: minimal preparations were required. After measuring the width of the GoPro Session, we cut a notch of sufficient depth on the short side of the cooler.
Pro tip (GoPro orientation): because the GoPro session can be mounted in various 90-degree orientations, rotate it in its case to have the USB charging port open on the opposite side as the mount, and just cut the notch in the Styrofoam a little deeper to allow the USB cable to be plugged in while in the installed configuration. Just remember in the GoPro settings to set the correct orientation (or you can post-process it in GoPro studio, after the launch).
Mounting the Colbert head and Ice Cream: to keep things simple and lightweight, we bought some 1/8” wooden dowels and light-weight popsicle sticks to create the mounting platform for the Colbert head and space ice cream. Using two of the wooden dowels, we hot-glued a popsicle stick to connect the sticks and create a platform at the end, and then glued the wooden popsicle sticks to the base of the Colbert head and then glued the ice cream on the back.
Pro tip (Field of View of video): be sure to use the WiFi feature of the GoPro or other camera to view what your mounting platform field of view looks like as you build it up, before you glue it in place. This will help you to make sure it is centered and of appropriate size to still capture some space in the background.
Cut-down mechanism: From past launches, we knew that the highest risk to recovery in our Colbert mission would likely come down to a tree landing. While we could always hire a tree climber for a fee, we wanted to build in a feature to allow our payload to release, should it decide to land in a tree (which it almost always does). We prepared the attachment line between the payload and the parachute by wrapping it around a resistor, which we could then command (by SMS message or by time-out) to heat up enough to melt the string and then hopefully release our payload from the tree.
Pro Tip (Attachment line): Be sure you carefully test and select your attachment line. Some braided fishing line and other fabric based lines may be harder to melt. We targeted a 30-40lb test line (to be under the 50 lb FAA restrictions), and found that Trilene monofilament line was the best suited from the lines we tested for reliably melting. The Trilene monofilament is a fluorocarbon material with melting point around ~177C, instead of ~147C for Spectra, but Spectra is also braided (multiple threads) and may not melt as cleanly.
Cell Phone Tracking Software and Telemetry: the cell phone was running our latest tracking software at the time. And good thing we had it – due to spinning (we believe), the SPOT GPS tracker malfunctioned and actually didn’t send any GPS coordinates throughout the flight, or after landing. It was only due to our tracking cell phone that we were able to locate the payload!
After all the above steps to prepare the craft were completed, we were ready to launch!

Out test craft, with counter-weight (we took the blue Colbert head, drilled some holes in the bottom of the plastic, and filled it with fishing weights), ready to go!
Check out the blog post next week, documenting the flight test itself.